How to Add Bank QR in Invoice Template
A QR code on an invoice allows customers to quickly scan and make payments or access specific information related to the invoice. In Giddh, adding a QR code is a simple process, especially if you're using digital payment integration (like UPI, Razorpay, etc.).
Step-by-Step Process to Add QR Code
Step 1: Go to the Invoice Template Section
After logging into your Giddh account, go to the left-hand menu and click on Customer, then select Templates. This section allows you to manage and customize templates.
OR
You can also directly access the invoice template editor using this link:
👉 https://books.giddh.com/pages/vouchers/preview/sales/templates?tabIndex=3
Step 2: Select and Edit Your Invoice Template
When you access the Template section, you'll see a list of available invoice templates. Identify the template you are using for Sales Invoices. On the template, you will find the Edit icon (🖉) - click on it to open the editor.
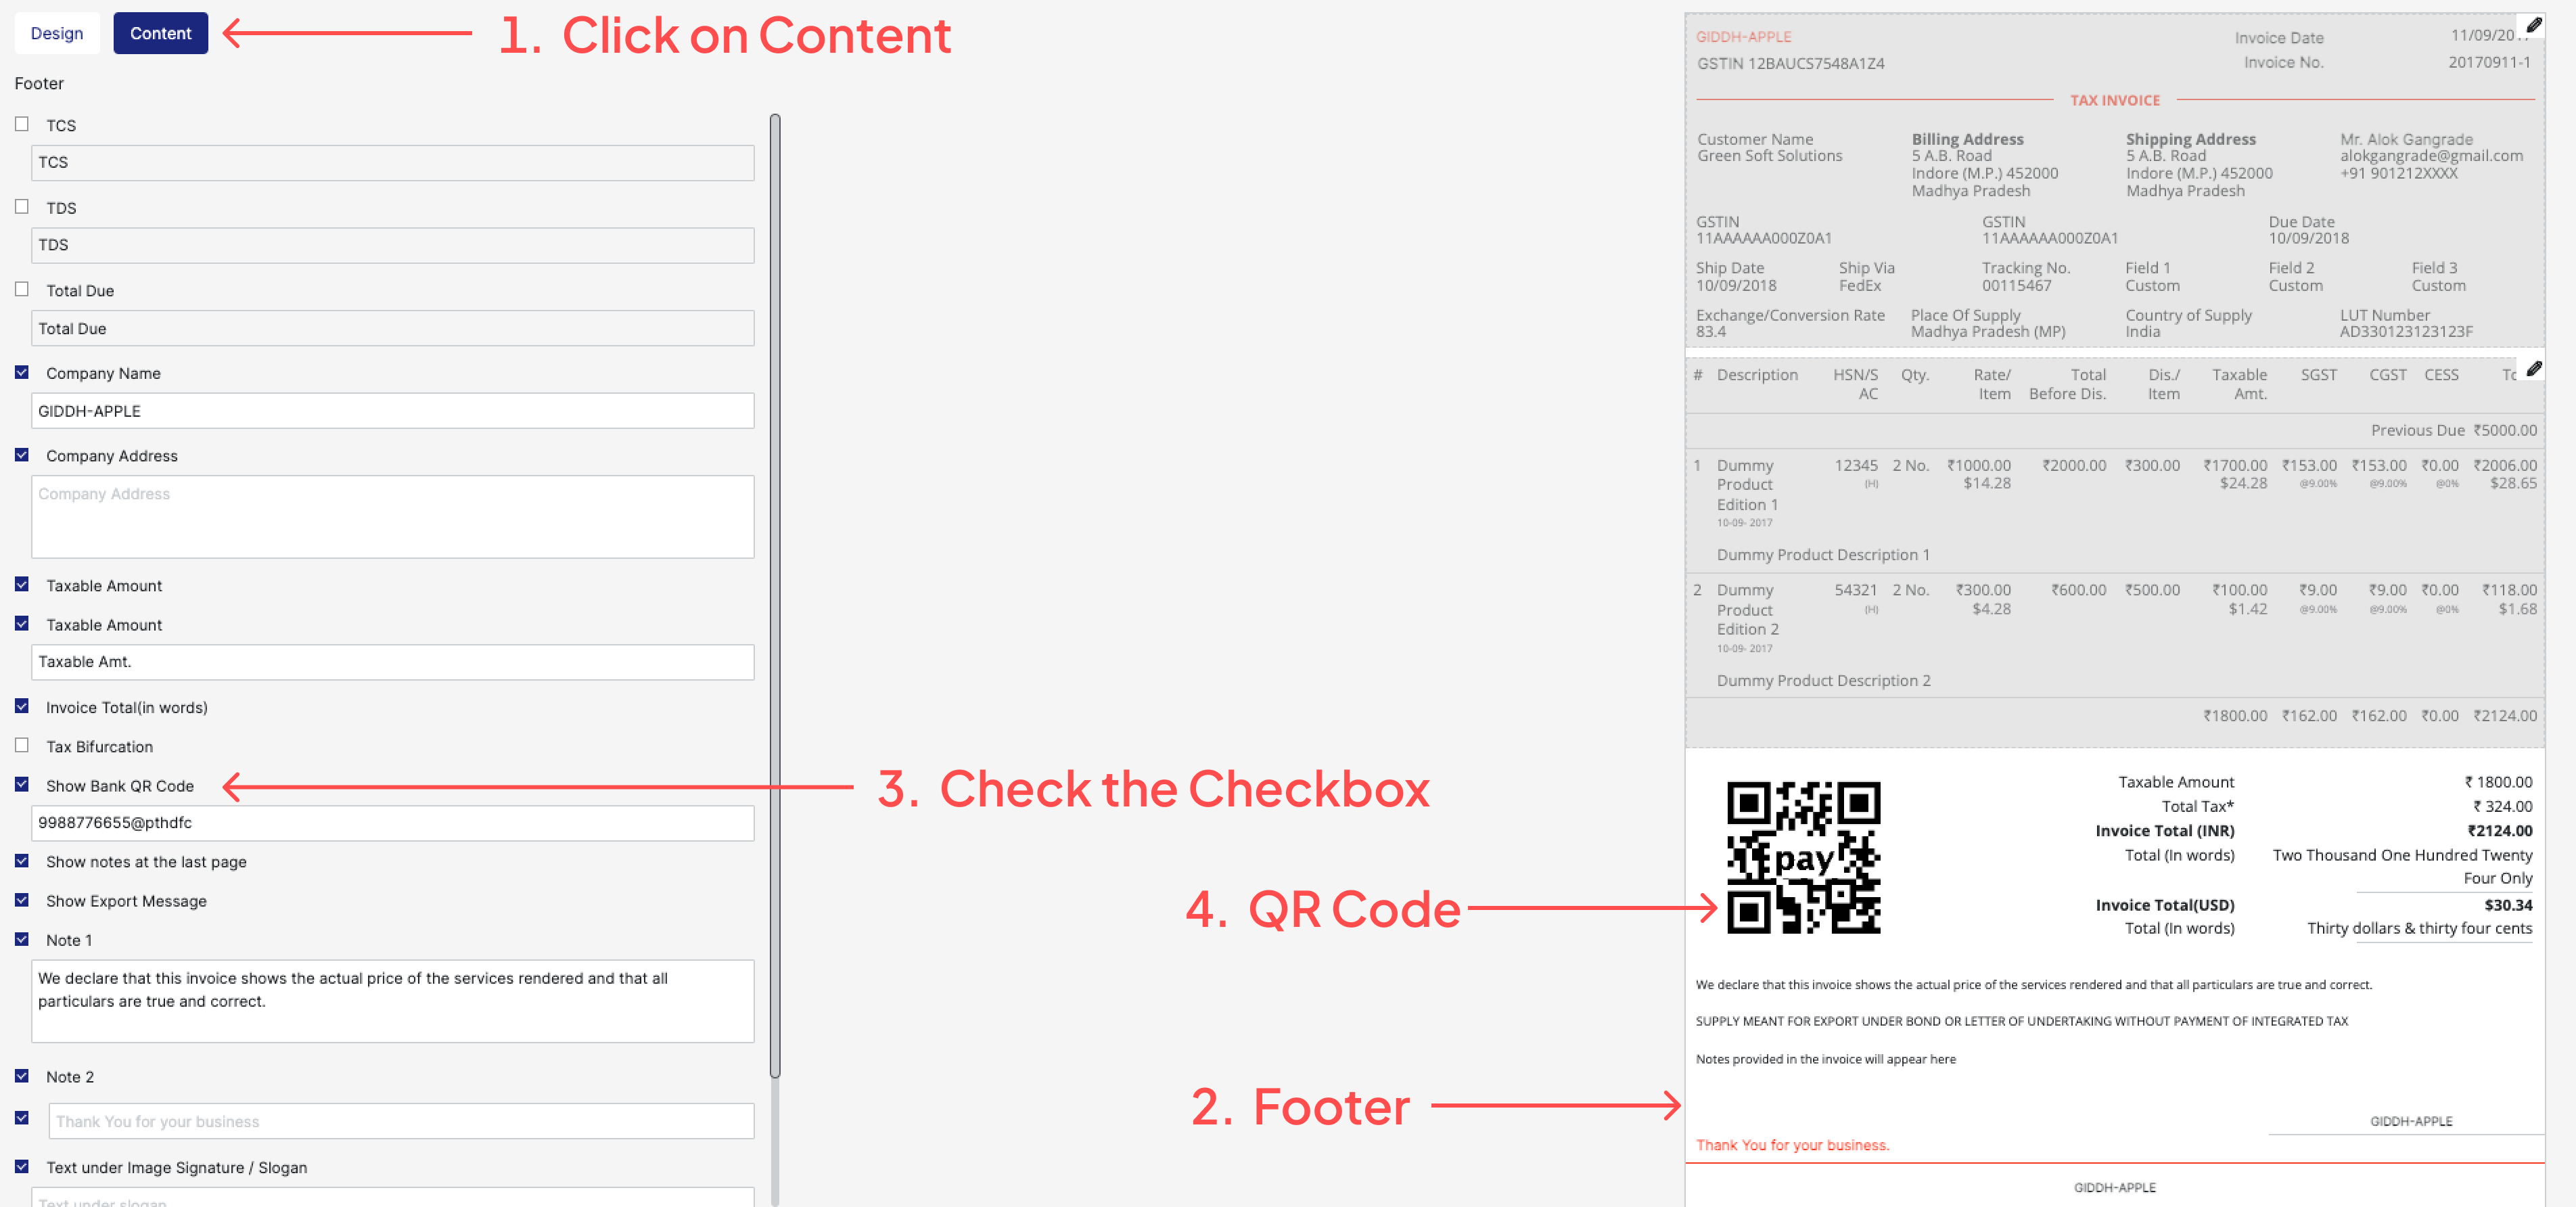
Once the editor opens, navigate to the “Content” tab. This section allows you to manage what appears in different parts of the invoice, such as the Header, Body, and Footer, including the option to add a QR code.
Step 3: Navigate to the Content Section
You will have the option to insert the QR code in the Footer section.
Footer: Positioning the QR code at the bottom keeps the layout clean and aligns it with the total amount, payment instructions, and terms & conditions. This placement is commonly used for maintaining a formal invoice structure.
Step 4: Enable QR Code and Enter UPI Details
Scroll to the option "Show Bank QR Code" and enable it by ticking the checkbox.
Enter your UPI ID (e.g., yourname@upi or 9876543210@paytm).
Giddh will auto-generate a QR code in real time.
This will be shown on all invoices using this template.
Step 5: Save and Apply the Template
Once you’ve finished adding the QR code and reviewing all the changes made to the invoice layout, scroll down and click on the “Save” button at the bottom of the page to apply your changes.
After saving, make sure to click on “Set as Default” if you want this updated template to be used automatically for all future sales invoices.
From now on, every new sales invoice generated using this template will automatically include the QR code, allowing your customers to make quick and convenient payments via UPI.
⚠️ Important Information
No Payment Notification in Giddh: Giddh doesn’t get live updates from your bank or UPI. The QR code is only for scanning. Please check your bank or UPI app to confirm the payment manually.
No auto-entry in Giddh: The transaction will not reflect in your Giddh account automatically—you need to record the payment manually if needed.